Seemed simple, but made mistakes and learned a few tricks along the way.
When should you change the oil?
- Check the engine oil level every time
- After first month or first 10 hours of use.
- Every six months or 50 hours.
We probably only use our motor for about 8 – 10 hours per season. So we change it out at the end of each season.
Quick instructions
If you don’t want to read all of the instructions (TLDR), here’s the quick and dirty steps.
- Shut off fuel and ensure cap and cap vent closed.
- Tilt engine toward tiller side, oil drain pointing down.
- Remove oil drain bolt and o-ring. Drain oil.
- Replace oil drain bolt and o-ring. Stand motor upright.
- Remove engine cover and oil filler cap and fill with 0.25 liters new oil. Replace oil filler cap and engine cover.
- Give engine a slow shake to move oil around. Check oil level in the inspection window.
Tools needed to change oil:
- 10mm socket wrench
- Flathead screwdriver
- Paper towels
- Catch tray for used oil
- Used oil container
- Small container for fuel from carburetor
- Funnel
- Place to mount outboard motor
- New outboard motor oil
10W30 4-stroke automotive detergent oil
0.25 liters, 0.26 US qt, 0.22 Imp qt
Optional:
- Water hose joint P/N 19271-ZV1-810 with short tube
- Oil pump
- New oil drain screw washer
Before we get started, here are the official instructions from Honda.
Preparing to change oil
A few more things to do before you start:
You are going to be tilting the motor about, if there’s fuel in the carburetor it may cause fuel to drain into cylinder causing engine damage. See Notice on page 2, section 4 of Honda BF2D Outboard Engine Oil Change.pdf.
- Ensure fuel cap tight and vent knob turned to off
- Ensure fuel valve lever is turned off
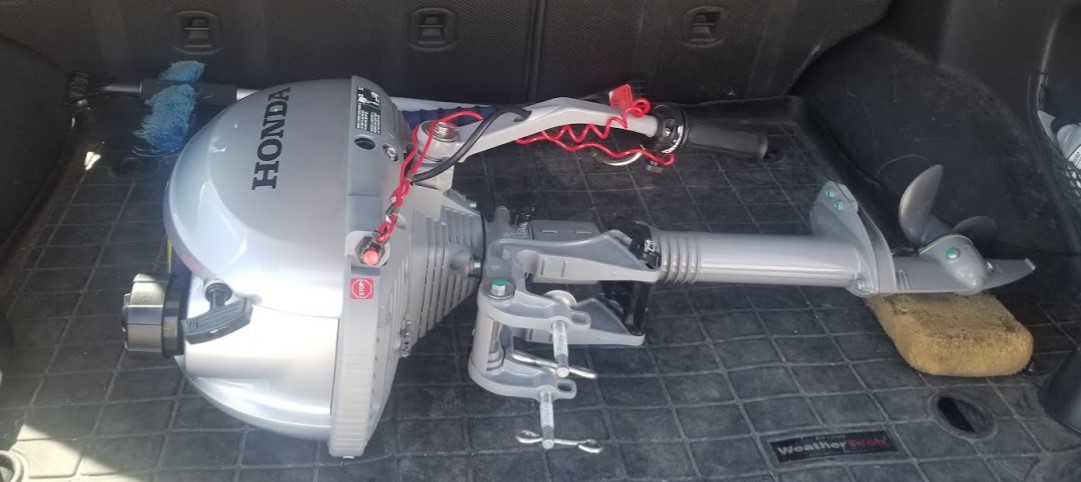
- Secure the motor on a mount somewhere. I just used a piece of plywood secured to my workbench.
- Remove the motor cover. Note, the instructions show it completely off, but the pull start handle prevents this. Let it dangle.
- Drain the fuel from the carburetor. Have a container ready to catch, it will be about a 1/4 cup.
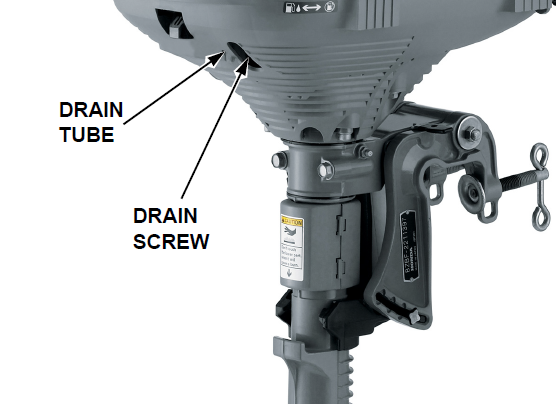
Draining the oil
If you have the water hose joint P/N 19271-ZV1-810, then you are going to make a lot less mess than I do. I would rotate the engine (still on stand) so the oil drain screw is facing up. Then unscrew and put in this small piece of hose. If you don’t have this, my method was a mess the first time but got better with this new method.
- Tilt up the motor and latch, like you would on the back of your boat, keeping the prop out of the water.
- Use a 10mm socket to loosen the oil drain plug
- Rotate the engine so that the oil drain plug is facing down
- Put a container down to catch the oil (I just used a used metal food tin from Costco, I collect these and use them for everything).
- Using your fingers, unscrew the drain plug and quickly pull away.
- The oil should shoot out in a somewhat straight pour into your container. Leave it like this for a while to catch most of the oil.
- Unlatch the engine and tilt slowly back to vertical (putting prop back into water) to remove remaining oil. This is where it starts dripping down the side, have paper towels ready.
- Replace the oil drain plug. Instructions also call for a new gasket.
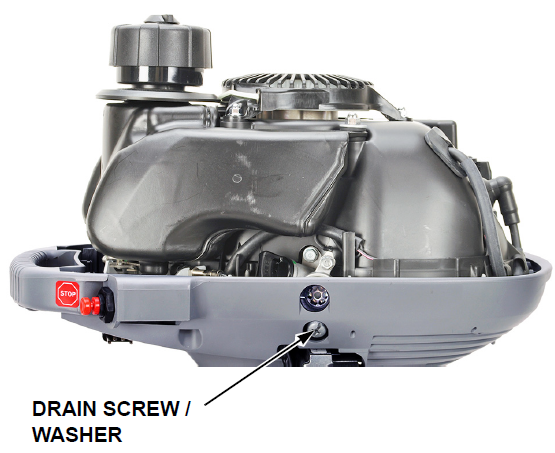
Replacing engine oil
- Tilt and rotate the engine so the engine oil filler cap is pointing vertically up.
- Remove engine oil filler cap.
- Wedge in a funnel. This is a tight fit.
- Add 0.25 liters of recommended outboard engine oil.
- Replace the engine oil filler cap.
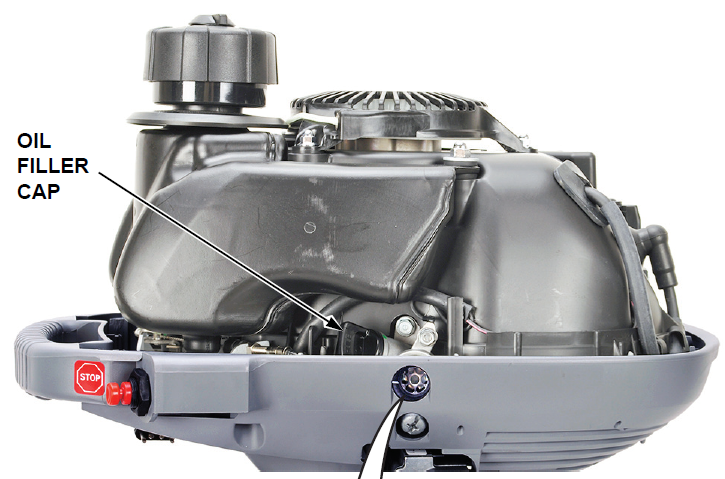
Another potential trick for this. Similar to the trick we’ve used with our transmission oil it would probably be easier to use a reusable squeeze ketchup bottle to refill the oil.
Check the oil level
Honda has this nice engine oil viewing level.
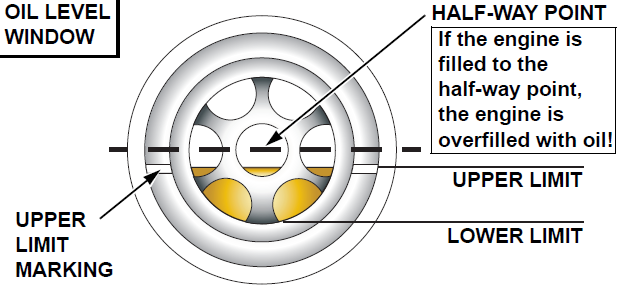
But be careful, it’s picky and won’t always show the correct oil level. If you tilt it back down to check the oil level and don’t see any oil, don’t be fooled like I did. Tilt the engine back up, rotate it 360 degrees and then back down. Wait 30 seconds.
My mistakes
Like usual, I made mistakes and improvements each time. First time was a mess.
I put the engine on it’s side on a workbench with drain screw facing down and tried to drain it like a vehicle from below. Started ok but not all the oil will drain, I tried to tilt it and it just resulted with oil dripping all down side, on the tiller and all over the floor.
I didn’t realize the oil indicator was a liar. Put in the recommended amount of oil, checked the oil level (it said none). So I then proceeded to add more oil. Then the oil level indicator was completely full. Drained off the excess oil using the oil drain screw, making more of a mess.



April 29, 2023 at 3:50 pm
Hello, just bought one of these used and it starts in the first pull runs good. The owner said he just changed the oil and I noticed after running it for a few mins oil coming from the bottom area. I can send photos if anyone could help in this matter. Thanks
January 10, 2025 at 10:35 pm
Yes! This has happened to me and the result was an oily mess that accumulated under the motor housing with the occasional drip into the water while at the dock. Not a good look! I bought this motor new and after four years I am convinced that I only need to see a little bit of oil at the bottom of the inspection circle. Anything near the halfway point is asking for trouble.